How work with Git Server
Terminology
At the top of the application, you'll find several buttons to interact with your project: Commit, Pull, Push, Fetch, Branch, Merge, and others. For now, you'll be particularly interested in the first 6 buttons, as they provide almost all the necessary functions for working with your project.
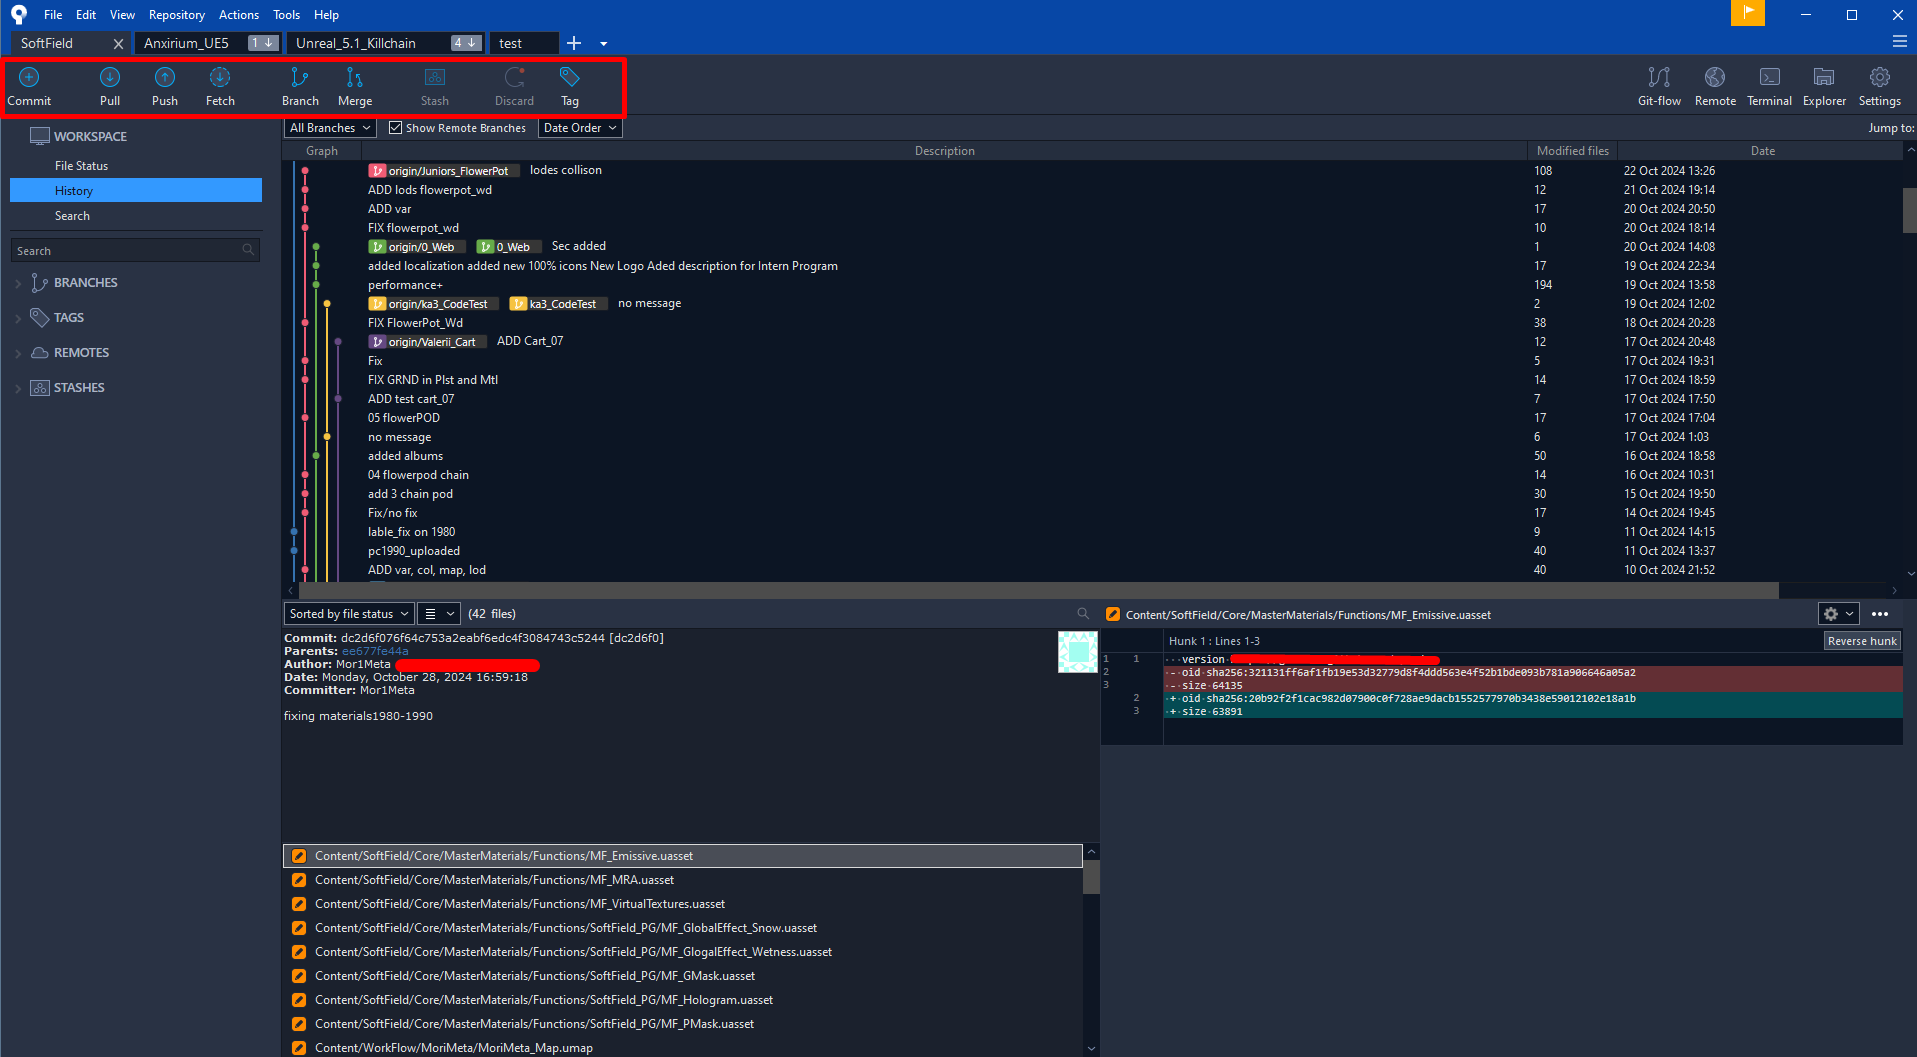
Commit: Clicking this button will open a window where you need to choose what you want to add to the server.
Pull: This button receives updates on the current branch, and if there's anything to receive, the number of available updates will be displayed next to it.
Push: This button sends the changes you've committed to the server. So, you first press Commit to finalize your changes (selecting what needs to be sent), and then you press Push, and all changes go to the server.
Fetch: This button checks for updates on your branch and all repository branches. It's recommended to always click this button before performing a Commit to ensure there are no new updates.
Branch: You'll rarely use this button. It creates a new branch from the current one, allowing you to work on separate changes independently from the main branch.
Merge: This button performs the merge of two branches. Don't take the word "merge" literally; it simply takes information from one branch and integrates it into your current branch, leaving the source branch untouched in the repository for further work.
Repository
A repository (or repo) is a place where project files and the history of changes are stored and managed. In the context of programming and version control, a repository is used to store and track all versions of the code and other project resources.
A repository can be centralized or decentralized. In a centralized repository, all files and history are stored on a single server, and developers can download, update, and upload changes to this server. An example of a centralized version control system is SVN (Subversion).
In a decentralized repository, like Git, each developer has a full copy of the repository on their local computer, and they can make changes and work independently from others. When needed, changes can be merged with other copies of the repository. This is the version we are using - Git.
A repository provides many advantages, such as tracking the history of changes, enabling teamwork on projects, reverting to previous code versions, and facilitating the merging of changes and conflict management when working collaboratively.
Local and Remote Branches
"Local and Remote Branches" are related to version control systems like Git. When working with a repository, you have the ability to create different branches to develop new features, fix bugs, or make other changes to the code independently of the main project branch.
Local Branches:
Local branches exist only on your local computer. When you create a new branch, it is saved locally, and you can freely work with this branch, make changes, commit, and test the code. Local branches are convenient for isolated work on specific features or fixes without affecting the main project branch or other branches.
Remote Branches:
Remote branches exist on a remote server, which is usually called a remote repository. This can be repository hosting platforms like GitHub, GitLab, or Bitbucket. When you push your changes from a local branch to the server, a remote branch is also created, which becomes available to other developers. Remote branches allow collaboration with other developers and merging changes from different local branches into a shared repository.
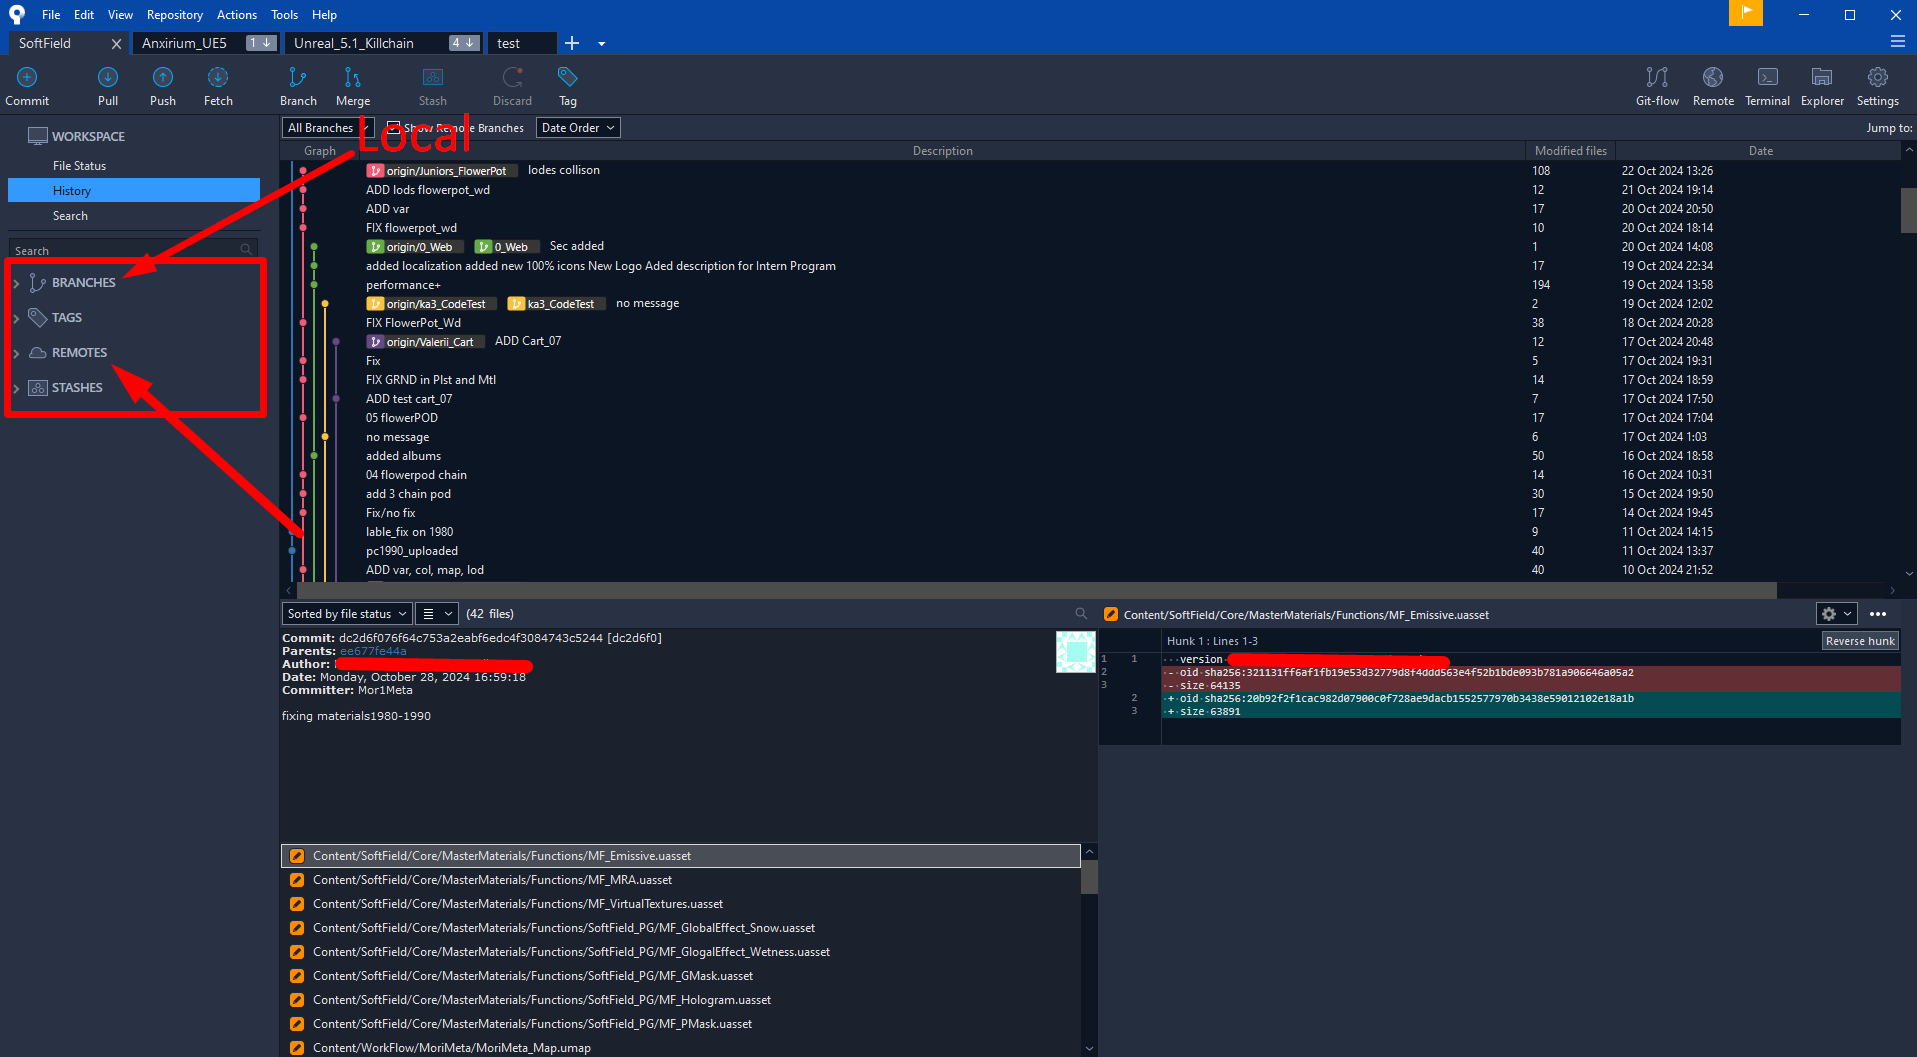
In the left part of the program, you will see several sections: Branches, Tags, Remotes, Stashes. We are particularly interested in two of them - Branches and Remotes. These sections show where local and remote branches are located, respectively. Branches represent local branches stored on your computer, while Remotes represent branches on the remote server. You can freely switch between these branches if you have no unsaved changes. However, if you have any unsaved changes in the current branch, you need to either discard them or commit them to the server before switching to other local branches. This ensures the safety and integrity of your project when working with different branches.
Changing Theme and Language
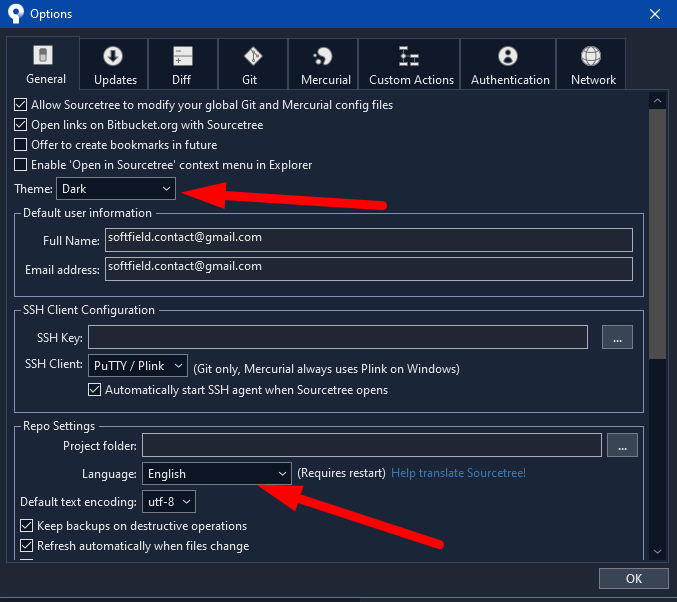
To change the application theme, go to the top of the window and click on the "Tools" button. Then find "Options" and click on it to open the settings window. At the moment, we recommend making changes only to a few parameters.
In the first tab, "General," you can choose the application theme - light or dark. We recommend selecting the one that is more comfortable for you.
Also, in this tab, there is an option to change the language of the interface. However, it's worth noting that our instructions are intended for working with the English interface, so we do not recommend changing the language to avoid possible difficulties in understanding the instructions.
Please be careful when making changes to the application settings to avoid disrupting its functionality.
How to Make a Commit
Before making a commit (saving changes), it's always recommended to check for updates on your current branch.
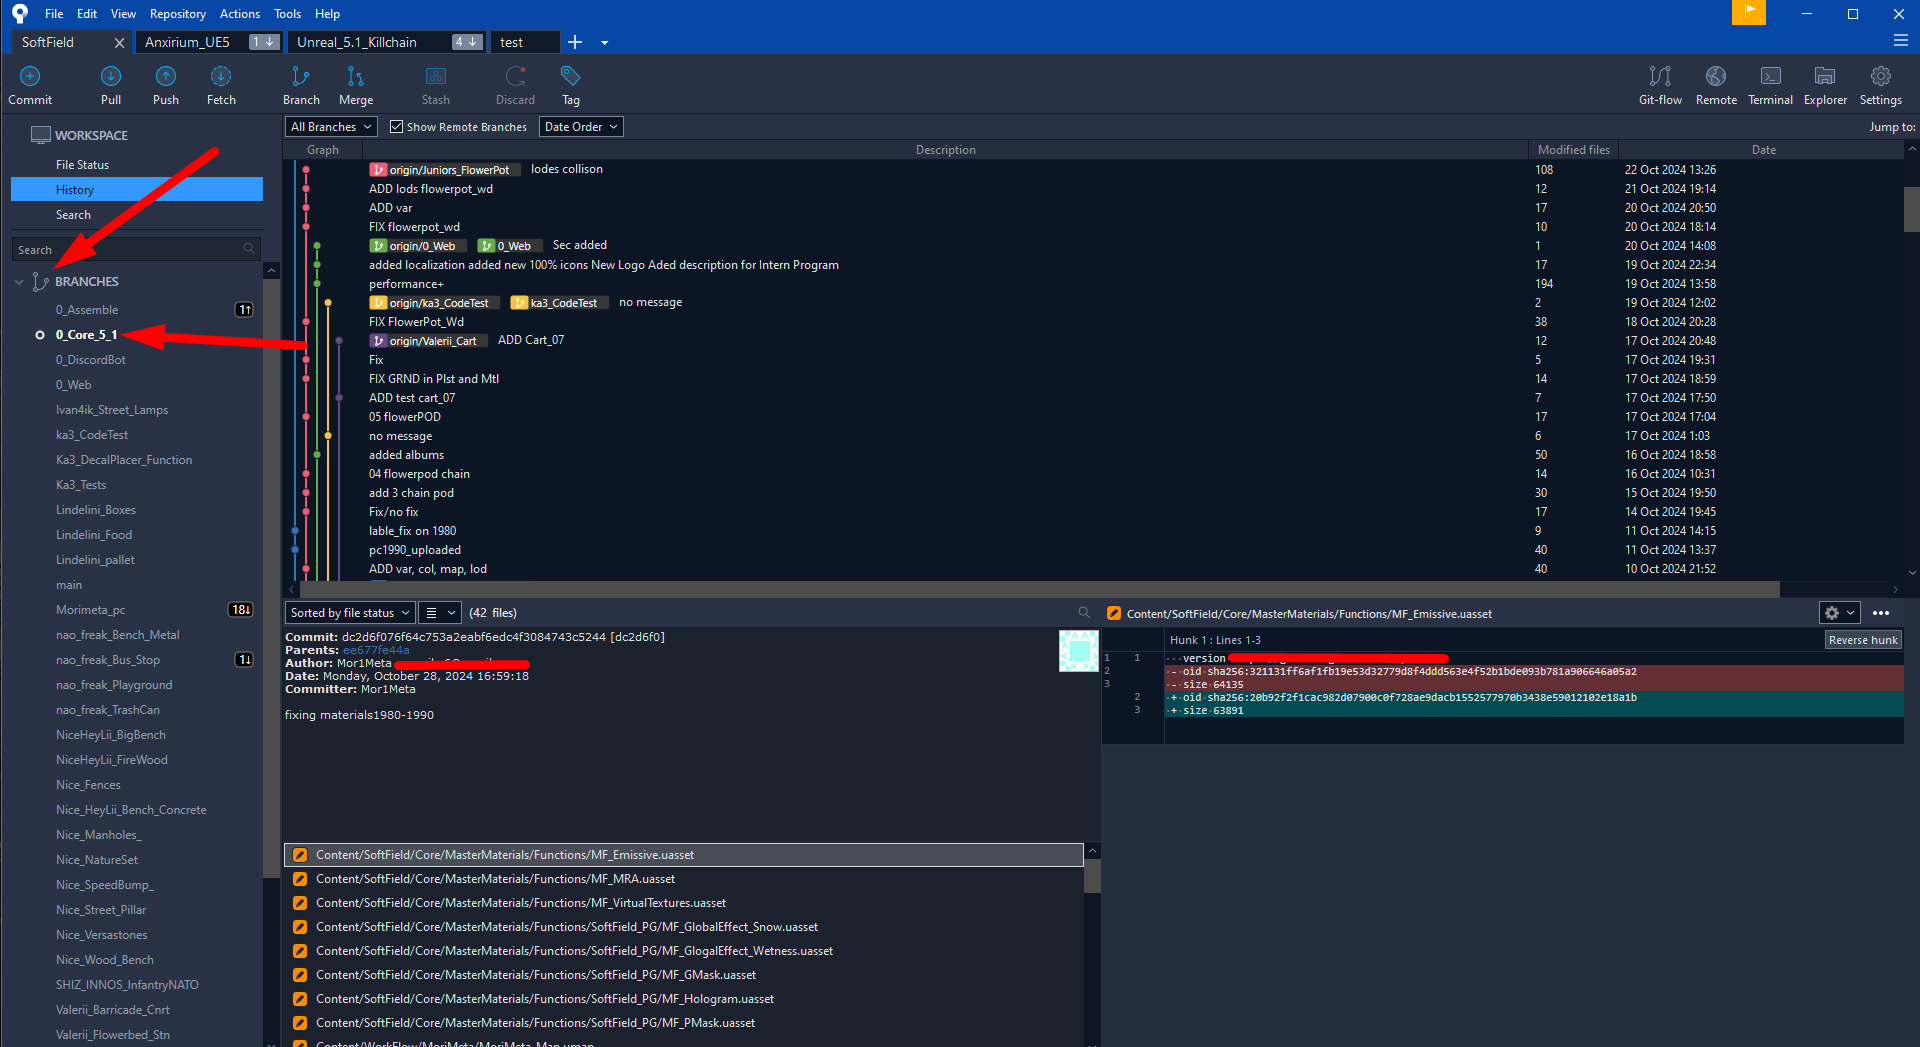
To determine which branch you are on, look at the list of branches on the left side of the application. It displays all available branches, and the one you are currently on will have a circle drawn next to its name.
The correct way to check for updates and avoid version conflicts is to follow this procedure: Fetch => Pull => Commit.
- Fetch: Click the "Fetch" button to check for updates and changes in the entire repository. This operation only checks for updates on the server without modifying your current branch.
- Pull: If Fetch finds updates, perform a "Pull" operation to accept these updates and merge them into your current branch. This way, your local branch will be in sync with the server.
- Commit: After a successful Pull and ensuring your branch is up to date, make a commit to save your local changes.
After accepting updates on your branch, if there were any, click the "Commit" button and select the files you want to send to the server. You can choose all files at once by clicking "Stage all," or select individual files by clicking the plus sign next to them.
After selecting files for the commit, be sure to write a comment for your commit. In this comment, describe what you changed or added so that other users understand the modifications made. Please use only Latin characters and the English language for writing comments. Using other languages or Cyrillic script may lead to remarks from the technical lead.
Also, it's important to remember that submitting a commit without a comment is not allowed. Your comment should be informative and understandable to other project participants. Following these simple rules will help ensure smoother collaboration with the repository and reduce possible misunderstandings.

After you've made a commit, the "Push" button will display a number, indicating the number of commits that can be sent to the server. Usually, this means you've made one commit that is ready to be pushed to the server. We recommend pushing the commit immediately so that updates are available to all project participants. However, there are cases when you can delay pushing the commit for some time.

The main reason for delaying the commit is the desire to complete work on changes in your branch and review them before sending. For example, if you are the lead modeler and want to check the work of other project participants, you can delay pushing the commit. However, be cautious, as if someone else sends an update before you, your version may become outdated, leading to version conflicts and requiring updates to be reverted. In such cases, it's recommended to inform the project participants whose branches you are modifying so they do not send updates to the server until you finish your changes. Usually, a coordinated approach with the team is used to avoid potential update issues. Merge requests and commits can be used in such cases, but they are usually redundant and burden the technical lead, so it's better to agree with the team in advance.
Rolling Back File Changes
Sometimes, you may encounter situations where you made changes to your branch that you don't like or want to undo. For example, you deleted some files or made other unwanted changes, and you are unsure of what to do next. Don't worry, there is a suitable tool for such cases.
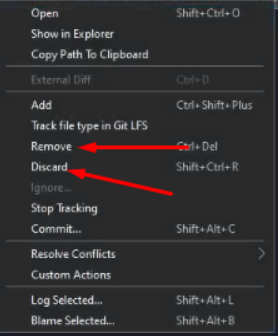
If you don't want to push specific changes to the server or want to undo certain actions, you need to go to the Commit section, find the files you want to remove or revert to a previous version, and right-click, choosing the "Discard" option. This will allow you to undo the changes and revert the files to their previous state. If this function is unavailable, it means that this file was not present on the server before, and there is no way to revert it to a previous version. In this case, you will need to select the "Remove" option to completely delete the file from your branch.
Unremovable Folder
Sometimes, you may come across a situation where you created a folder in your project, but you cannot delete it from the game engine, and Sourcetree also doesn't allow you to revert or remove it. Don't worry, this could be due to an error in the game engine itself. In such cases, you can follow these steps to remove the folder:
- Open the File Explorer and navigate to your project.
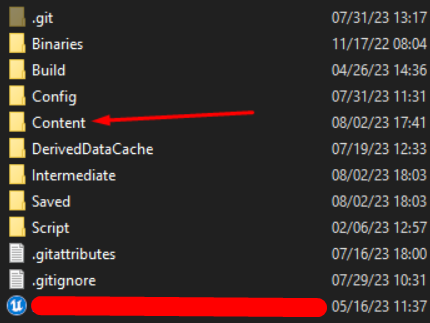
- Then go into the "Content" folder. Usually, this is where all the files and folders of the project are located, which you see in the game engine on the left side.
- Find the folder you want to delete and perform the deletion operation as usual.
- After that, the folder will be removed, and you won't see it in the project anymore.
Simply follow these steps, and the unwanted folder will be successfully removed from your project.
Creating a New Branch
Sometimes, especially if you just joined the team, you need to create your own branch to work in. This is important to minimize conflicts on the server and to give each team member their own space to work. If you make changes or "break" something in your branch, it will only affect your work, not others on the team.
When working with branches, there is one important rule - you cannot change or replace anything in the "Core" branch. It is the main branch with the project's core logic, and making mistakes in it can damage the functionality of the whole system. So, "Core" is only used in two cases: to create a new branch and to check for updates in "Core."
Having a local branch for future merging is not mandatory on your computer, but it can make it easier to track updates in "Core."
If you just joined the project or want to create a new branch from scratch, you need to download the "Core" branch or, if you already have it, switch to it and click the "Branch" button.

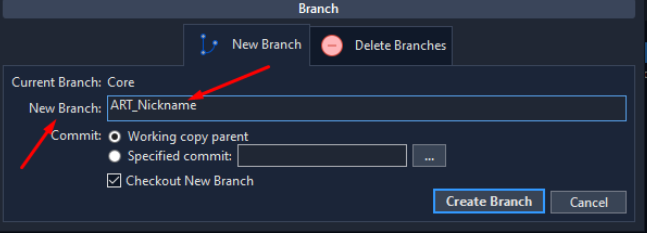
After clicking the "Branch" button, a window will appear where you need to give a name to your new branch. There is one important rule: everyone who works with graphics should include "ART" in the branch name. After that, you add your nickname, and that's pretty much it. However, sometimes it's necessary to specify what exactly the person does on that branch because one artist might work on different aspects like vehicles, characters, weapons, and so on. So, their branches might be named as follows: "ART_Nickname_Vehicle," "ART_Nickname_Weapon," and "ART_Nickname_Characters."
It's important to know that when you create a new branch, it is created from the current branch you are on. By creating a new branch, you are making a separation from the current one and copying all the information from that branch with a different name.
Switching Between Branches
Sometimes, you may need to switch between branches. It's very simple to do: just select the branch you want and double-click its name, and you will switch to it. It's important to note that you can only switch between local branches. If the branch you want is not locally available on your PC, you will need to download it. To download a branch, double-click on the desired branch, and the download process will start.
Also, remember to either undo changes you made in the current branch or make a commit before switching to or downloading another branch. Otherwise, the system won't allow you to switch or download the branch.
Merge or "Accept Update"
The "Merge" button performs the merging of two branches, which is usually referred to as "Accepting an Update." Since all branches work off the main "Core" branch, everyone needs to accept updates from this branch to have their assets and other files up to date. We recommend checking for updates in the "Core" branch as frequently as possible. To always be aware of updates in "Core," we recommend downloading this branch but not working in it; let it be just available locally.
Every time you click "Fetch" to check for updates in the repository, the system will check for all updates in general, including those you have already downloaded and those you haven't. If the "Core" branch is downloaded, you will see a special icon next to it, and you can accept the update to incorporate the changes into the "Core" branch. After that, the symbol will disappear, and you can apply those changes to your branch by performing a merge.

To perform a merge of two branches (in the case of "Core," it means accepting updates from "Core" into your branch), you need to switch to the branch where you want to add information from the other branch. This is a very important step, as the merge is performed from one branch to the one you are currently on.
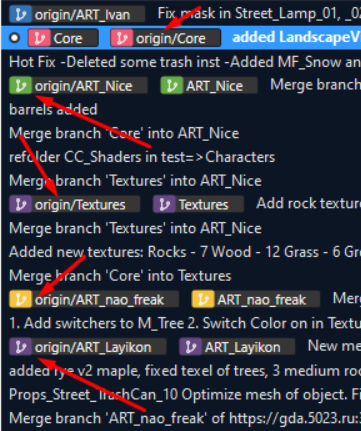
Once you have selected the branch where you want to perform the merge, click the "Merge" button. Then a window will appear with a list of all commits in the repository. You need to select the specific commit you want to download into your branch. It is highly recommended to download only the latest commits from a specific branch.
To understand which commit is the latest, the comment line will read "Origin/...". You simply need to select the latest commit and click "OK." There's no need to press anything else; the selected commit will be downloaded into your branch.
Merge Conflict
When merging branches, there may be an error related to file conflicts. This happens when you and the branch you are merging from have the same files. The system cannot determine which file to keep - the one in your branch or the one from the branch you are merging. But this conflict is easily resolved by understanding which branch you are downloading information from.
If it's the "Core" branch, in 99% of cases, you should accept files from the "Core" branch, not your own branch.
Sometimes the system may show an error with file conflicts, and sometimes it may not. To check for conflicts, click on the "Commit" button and see which files are suggested for commit. If there are no such files, then you have no file conflicts, and you can immediately click the "Push" button to send the merged branch to the server. If you have files to commit, then follow the instructions below.
You may encounter individual files or multiple files with conflicts, which can be easily identified by the exclamation mark icon next to the file name.

To resolve conflicts, click on the file causing the conflict, then right-click. In the pop-up window, find "Resolve Conflicts" and choose which file to use: "Mine" (your file) or "Theirs" (the file from the branch you are merging in). In the case of "Core," it's recommended to always use "Theirs."
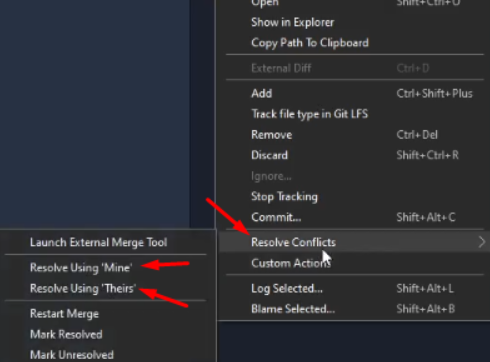
After resolving all conflicts, you can perform a Push to send the changes to the server. In this case, if there were conflicts, the system will automatically write a comment indicating where the conflicts occurred, and you won't need to comment on it additionally.
Errors
If you encounter an error when downloading or uploading updates to the server, it may be due to not following the steps mentioned above. If you have followed the instructions correctly, the error is likely related to other factors. In such a situation, first, try to understand what could have caused the error so that we can resolve it faster. There could be many possible error scenarios, so try to recall what you did before the error occurred; this will help us find a solution faster. One common error when uploading updates to the server (not related to branch merging) occurs in two cases:
- You didn't check for updates in your branch, and there is already a new commit on the server, causing a version conflict.
- If you are a programmer and your files depend on the project's core, they may not work properly due to incorrect copying of files from other projects using Copy/Paste.

In the first case, you have two options: if problems arise, contact the technical lead and get feedback on your actions. This will help you resolve the issue and avoid mistakes in the future. Remember that the lead may point out possible carelessness if you didn't follow the instructions, so it's better to always be attentive and act according to recommendations to avoid unnecessary errors and misunderstandings. The second option is to try to solve it on your own.
If you encounter an error when sending updates to the server, do not click Fetch, as this may worsen the situation.
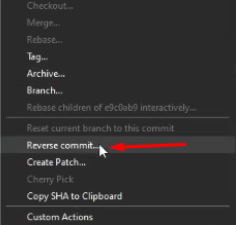
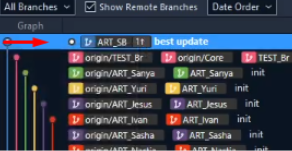
You need to find your commit in the list of commits, which should be at the top. Select it and right-click, then choose "Reverse Commit." In the pop-up window, click "Yes." Then click Fetch, and if Pull shows a number, it means you didn't check for updates beforehand. Click Pull, then Push, and the problem will be resolved.
However, keep in mind that all your changes will be removed since you performed a reverse commit. If you are sure there are no updates, it is likely that you copied files from another UE5 project and pasted them into this one. Try going into the engine and doing "Fix redirection" on the Content folder. Then check for any changes in Commit, and if they appear, try adding a second commit and sending it to the server. If the error persists, you will have to be prepared for all changes to be removed. In this case, contact the lead to help you resolve the issue.
There is one workaround to keep your changes in the engine, which is to manually copy all files before making a reverse commit, and add them one by one and see if an error occurs. This way, you can preserve your changes and fix the error.
As we have mentioned, there could be many reasons for errors, so if you are unsure of your abilities and knowledge, it's better to contact the technical lead to help you avoid exacerbating the situation and solve your problem.

